Jason recaps the events from Agents of Edgewatch S2|25: So This Is Paradise?
Well, it took a while, but we finally found the cultist lair toward the end of last week’s episode. This week, we actually get to fight our first cultists.
But first, we actually get to level up to Level 8. It’s not a huge level for Basil, but there are a couple of nice little additions.
First, we have an expansion of our spells. With normal casters, you get your new spell levels at the odd character levels; with multiclass archetype casters, you get your spells at the even levels. So at Level 8, I get my first Level 3 spell, and it’s a fun one… Invisibility Sphere. Again, I’m sticking with utility spells as my primary focus: I’m not saying I’ll NEVER take an offensive spell, but for now, I’m sticking with “bang for the buck”. I had considered taking single-target invisibility at Level 2, but this is much better since it targets the whole group. It doesn’t really specify a maximum move speed; it basically works out to “when in explore mode, you can move as a party and stay inside the sphere; in combat, you have to manage it more carefully.
The other get here is Arcane Breadth, which is more of a long-term play, since it will add spell slots as I level. It’s basically a second slot for whatever your N-2 spell level is. So for now, it’s just a second Level 1 spell, but it’ll grow along with me all the way to Level 20, so that’ll be nice. Add in staffs and wands, and I may actually be able to become a reasonable approximation of a caster before this is all over.
The one I stumbled into by accident was the six-second magic item identification. I took Quick Identification just because it seemed handier than anything else I could take from the list of skill feats, but also taking Arcana as my master-level skill made it so Identity now takes three actions (aka six seconds). So that ended up being a nice little bonus.
Of course, Dougie probably gets the most combat-useful ability, with his reaction-based attack. It’s not immediately obvious at low levels, but as you gain levels and move into more powerful abilities, it’s becoming clear that reactions are a real game-changer in 2nd Edition. When three actions are all you get, anything you can do to squeeze out extra actions is great. Especially if you can mitigate damage to yourself or (even better) do damage on the enemy’s turn. It’s also dawning on me that using my Shared Stratagem with Dougie’s reaction could be a deadly combination.
Now, at the end of the last episode, we were talking about taking on Tyrroicese and rescuing the Graycloak captain, but I think enthusiasm for that plan faded between episodes. I don’t think anyone came right out and said it, but I think once we found the cultist lair and reached the parts of the map Dannicus gave us, I think we wanted to dig into that sooner rather than later, rather than risk losing another day to what was likely to be a tough encounter. Also (this I did mention), there was a little bit of a sensation that maybe exploring the cultist lair would open up some opportunity or tool for dealing with Tyrroicese. At the risk of meta-gaming, sometimes Paizo’s adventure authors do put the solution to the problem somewhere else in the dungeon. So if the thing is vulnerable to good damage, maybe there’s a source of good damage somewhere in the cultist rooms or something.
So into the lair we go. We have two basic choices. If we go west from the safe room, we end up on the front porch with the two daemons and the flesh golem. We’d be dealing with some serious enemies right off the bat… boss-level, even… but the upside is it would likely be a self-contained fight since they’re basically outside the main complex. If we go north and/or east, we’re heading into the heart of the complex. The upside there is we’re likely to be dealing with normal cultists instead of big-bads, and the first few rooms (“lookout”, “torture room”) seem like they’ll be populated with grunt-level cultists. The downside is the rooms are packed together with lots of connections between rooms, and some of them don’t even have doors. So it MIGHT be a challenge to take one room at a time without bleeding encounters. If there’s a tiebreaker, it’s that it also feels like MAYBE the rank-and-file cultists would be more likely to fall for our disguises, so maybe we can infiltrate without fighting. I’m almost SURE the daemons would probably “smell good on us” or something and attack right away.
So north we go, into the area marked as “Lookout”. But first, we send Dougie climbing along the outside wall to do a little recon and get a little element of surprise by coming in through the lookout “window”. The rest of us take the door, and for the moment, it’s a fight against a single cultist. That’s a positive start, right? It doesn’t last, as a few reinforcements come down from the north (labeled as “Torture Chamber”), but the fight itself is still manageable because these guys just aren’t that tough. Also, we do catch a break because the rooms in this area are sound-proofed, so at least the fight shouldn’t spill too far beyond these two rooms. So OK, it’s a warm-up fight. Cool.
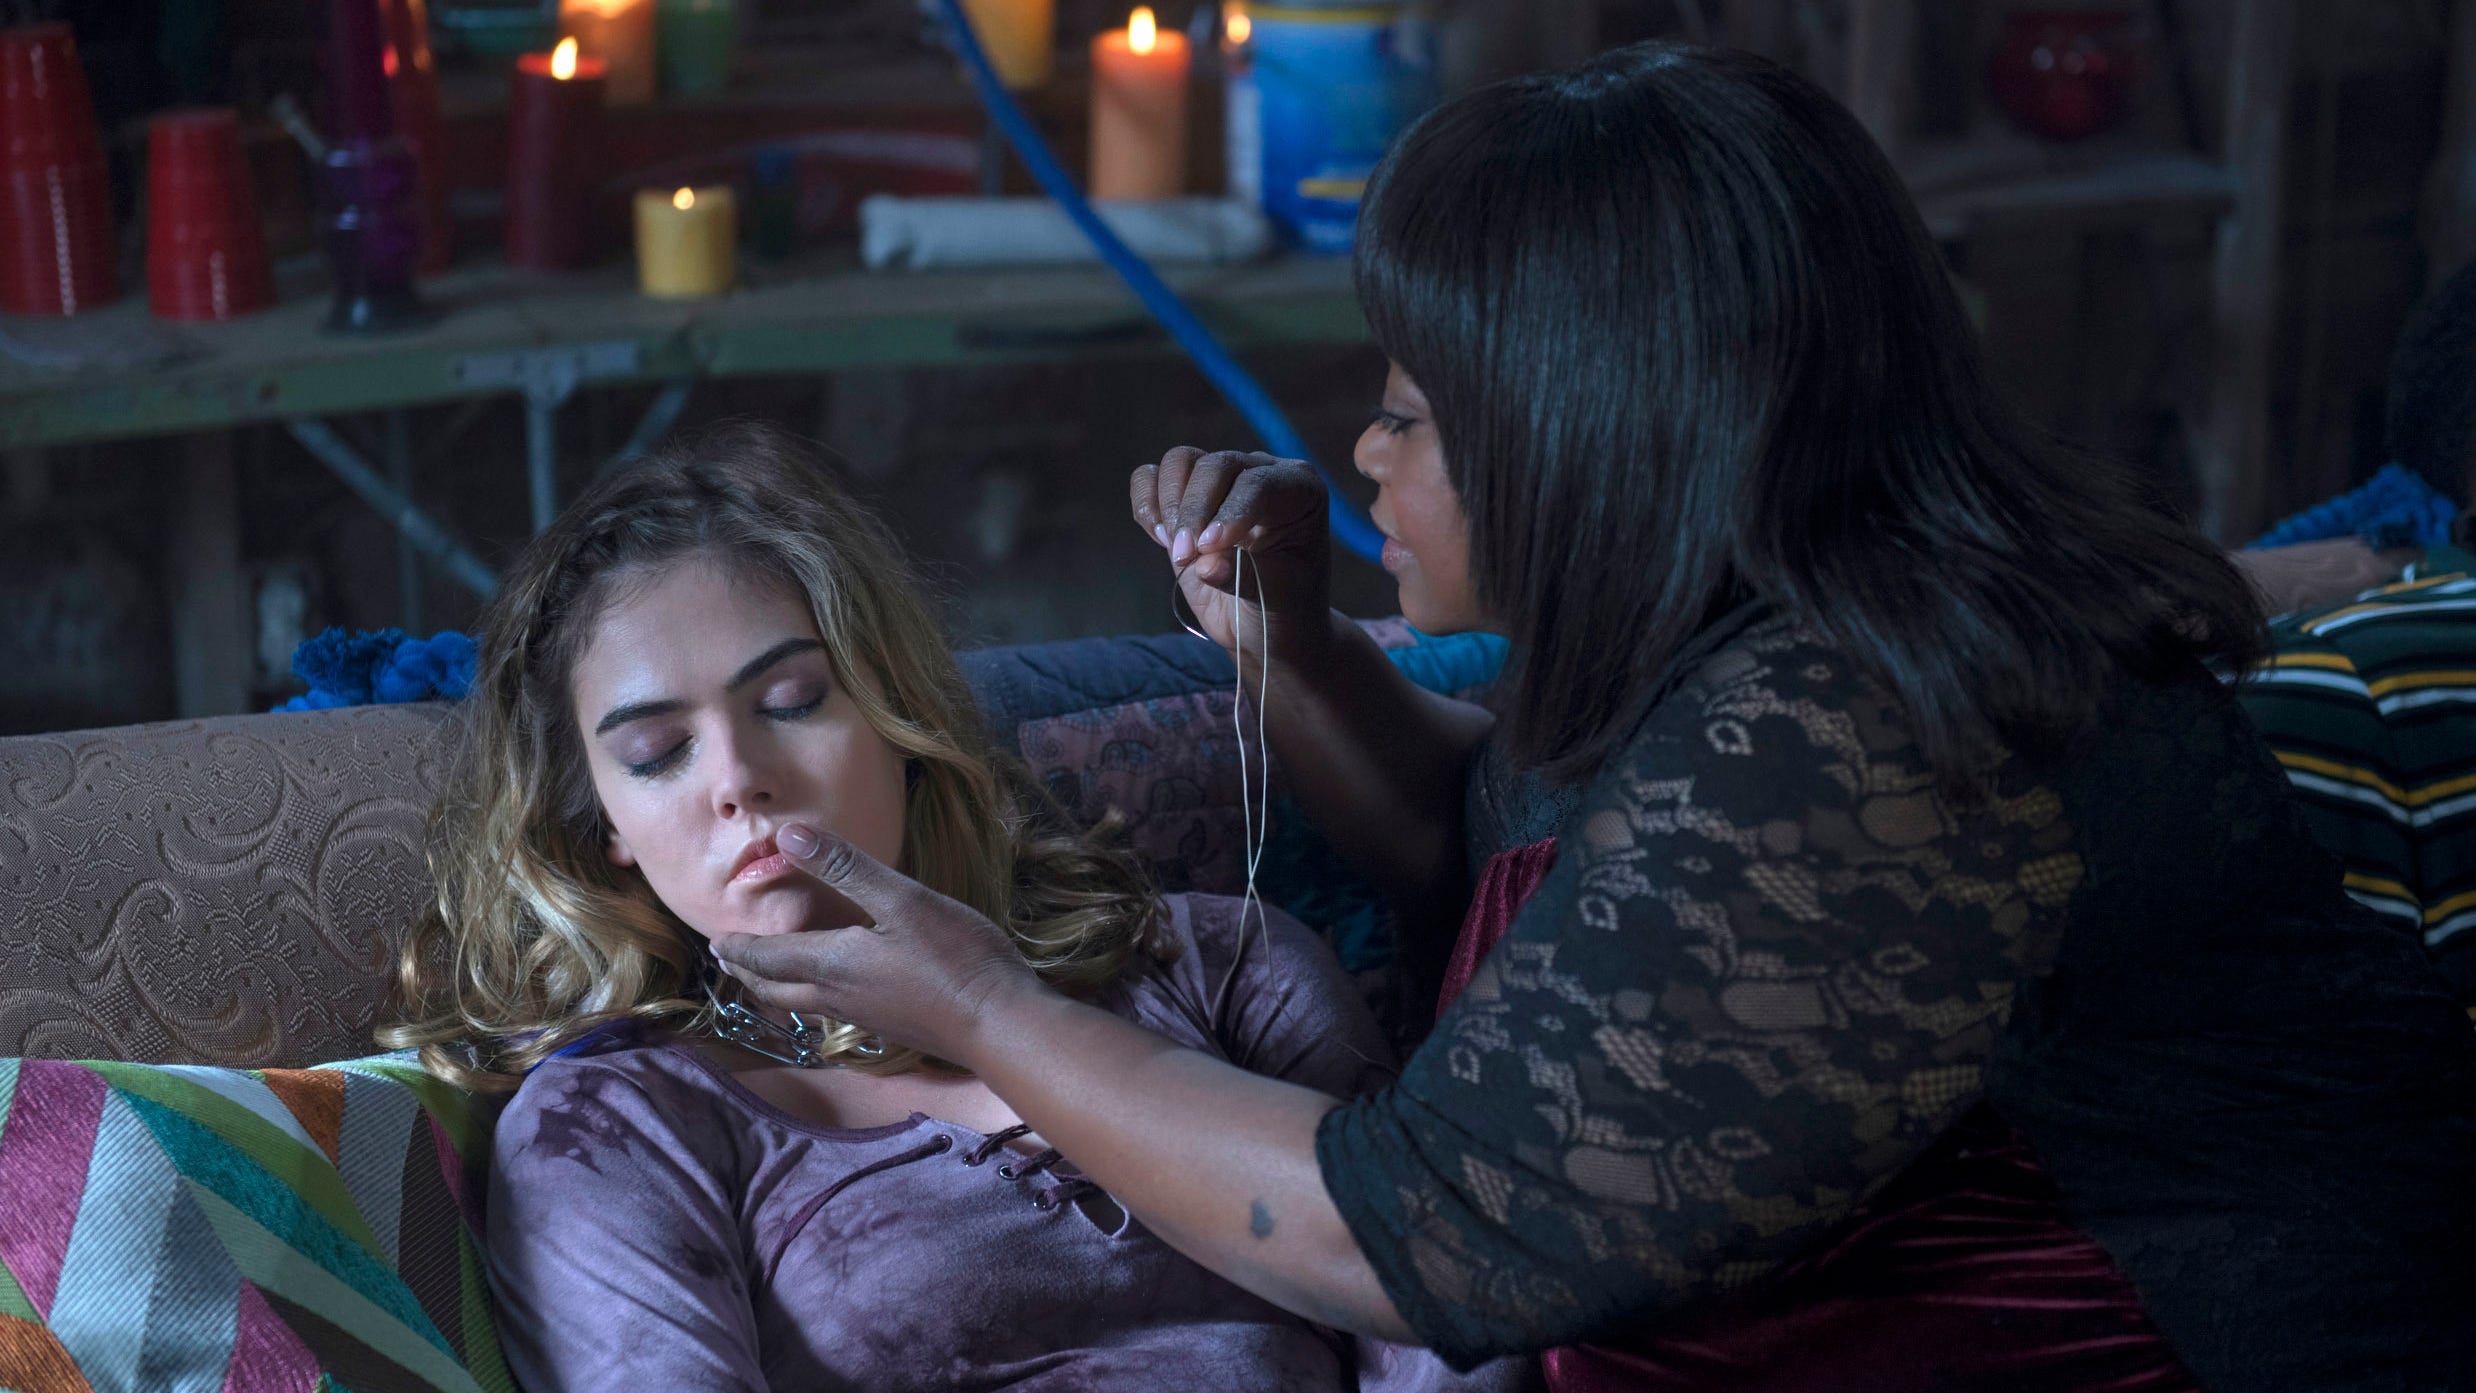
We do get a reminder of the nastiness and horror themes at play with the appearance of the Seamers, literally SEWING THINGS TO DOUGIE’S FACE while they’re fighting. And the fact that they’re torturing people for jollies. OK, maybe it’s not bad-bad like some of the heaviest stuff that was going on in the murder hotel (redcap, anyone?), but it’s still a little creepy around the edges. And OK, if we’re already getting into stuff like this in the first room, one wonders what’s waiting for us further in.
I suppose we’ll find out more next week as we continue our exploration of the cultist lair and find some more cultists to kill. As always feel free to drop by our Discord channel or other social media and let us know what you think of the show. Thanks for listening and we’ll see you next week.